Monday, January 28, 2013

Bathroom Demolition

The first step of any renovation project usually starts with demolition, and this one is no different.  I am sure most of you have watched the renovation shows on HGTV where people start bashing the walls in, well that is what we did, but I don’t have a sledge hammer or a large pry bar.  I just have a regular hammer and a small pry bar.  We were replacing the tub so we did not care about scratching it up, or we would have placed a drop clothe in it.  One tip is to plug the drain so debris doesn’t fall into the trap. 

We knew there was water behind the tile as the grout would be wet after we would come home from being away for the weekend, but we weren’t prepared for how much water was behind the wall. 

SAM_0338

SAM_0348

The whole substrate was soaking wet with water.  We were now able to identify why were having some of the problems.  As you can see from the pictures you can see the screed marks from the trowel when the tile was placed on the wall, with some small indentations from the tile in it.  Wall tile should be "back-buttered” which means to put some mortar on the back of the tile as well as on the wall.  This helps the two adhere to each other better.  So the screed marks are good channels for the water to run along, and being on an exterior wall somewhat susceptible to freeze thaw cycles that we experience here in Calgary.  The lack of adhesion was also noticed when were were knocking tiles off with a light blow with the hammer and several tiles would fall off the wall. 

Another major problem was the fact that the backing board was plywood.  In other locations plywood is a great substrate for tile, but in a bathroom wall it should really be tile backer board or cement board and a waterproof membrane is not a bad idea either.  As can be seen above the plywood was soaked as well and developing mould in places, so off it came.  

SAM_0360
As the bathtub is 60” long there is a joint in the plywood.  You can see that the plywood was placed vertically and the joint was placed on side nearest the faucet and fixtures. 
SAM_0364

The plywood is soaked on the back side of the plywood.  Notice that there is a window in the wall so the plywood joint comes basically in the bottom corner near the faucet and fixtures.  This should be avoided if possible so that if water were to migrate through finish it cannot make it to the structure and do damage there.  The insulation had been changed from the original, and I know this because there was yellow batts of fiberglass insulation tucked down beside the tub.  The vapour barrier that was used was a flimsy poly and was not adhered to the studs with anything more than staples.  There is a proper poly for vapour barrier and an acoustical sealant should be used as well to stop air flow around the poly.

SAM_0371

SAM_0370

As you can see the sill joist and the jack stud were severally rotten due to moisture that had penetrated in the past.  I was surprised though that that would was dry.  The damaged had been done earlier in its 32 years of life.

SAM_0372

So out came a couple of studs and the sill for the window and one of the cripple studs came out partially to sound wood.

SAM_0373

The last part of the demolition came with the tub removal.  There was an access hole through the wall in my daughter’s room, but it was not big enough to work comfortable in so I made it bigger.  I had to reach down under the tub and unscrew the P-trap fittings and the overflow drain.  That was all that was holding the tub in place.  I just had to lift it out, which takes a bit of effort with the steel tubs.

On the next post we will start to put it back together.

Tuesday, January 1, 2013

Bathroom Reno Project

We have noticed for a while that there has been water weeping through the grout on the wall in the shower.  The wall would be wet still even after days away from home.  There was lots of cracks in the grout and these may have appeared when we bought the house and the heat had been turned off and the house was –30C, but there is no way to be sure. 

Here is my daughter in the tub as we prepared to gut the whole thing. 

SAM_0332

Since we are going through the work of replacing the tub surround my wife also wants a new tub that is taller, and we are going to change to the pressure balanced faucet to make it safer for the girls. 
To be able to expedite the work I made sure that I had all of the major components on hand.

The tub surround we purchased from Home Hardware and we got a TW57 79” 1 Piece White Tub wall.  We chose this one for several reasons. The main was that I did not want any water to get in behind it, so a 1 piece was very appealing.  We have a window in the middle of the wall as can be seen in the picture above.  The edges are approximately 13” from the corners so a tub surround that had high shelves or ridges in the polystyrene would be out of the question as we did not want a large opening in the window frame.  And finally the white color matches the new tub.

We purchased the bathtub from RONA it was a “Corinthia II” made by Advanta by Maax.  As mentioned we wanted a taller tub and needed one that was right-side installation.  We also got the overflow kit and accessories from RONA.  The tub it was replacing was a standard size so this was pretty easy change.

The Tub/Shower Handshower we purchased from Home Depot it was the 8P8-PDHC Price Pfister Pasadena Handheld Shower Single Handle Tub and Shower Faucet - Polished Chrome. I really like to have a handshower so that was a priority and my wife wanted it to look pretty so this is what we landed on. 
I will go into more detail on the steps of the project in future posts as well as reviews of the above products that we used.

You can follow the progress in this project by following this link or by clicking on any of the tags.
http://projectsbyben.blogspot.ca/search/label/bathroom

Friday, November 2, 2012

I love it when a plan comes together

Well, we are quickly preparing for the renovation of the tub and shower in the main bathroom.  I am scurrying around and gathering up the needed supplies.
The grout has cracked around the tub and there has been water infiltration behind the tile so we need to change the tile out.  The quickest and cheapest solution is to install a tub surround.  Karalee wants a taller tub, so now is the time to change that out.  The faucet system is the old two handle system and with the younger children we want to change that to the pressure balanced one handle faucet. 
I have never changed or installed a tub before so this will be a learning experience, I have participated in installing a tub surround before. 
Along with the tub surround change we will need to retile the floor, paint the new drywall and install the new toilet that we have had since we moved in. 
We will be taking pictures and posting them up after the work is complete.  It is going to be a busy weekend. 

Wednesday, June 20, 2012

Brakes and Rotors

My wife's PT cruiser has needed the brakes done so it has been on the list.  They have been scraping when she applied the brake, so it is time to change them.  My neighbor was kind enough to allow me to once again use his garage to perform the maintenance and show me how to do it.  This trip into the garage is only the front brakes, the rear ones will require a second trip in as there is only so much time in the evening to get the work done.

This was a fairly straight forward process.  We jacked up the front of the car and chalked the rear wheels.  We took the front wheels off.  On the brake caliper there is a bolt to hold the caliper to the wheel hub.  We undid that bolt and pulled the calliper off of the rotor.  You don't want the caliper to hang by the brake hose if you are going to put it down so we tied them up.  Also, sometimes you need to spend some time working on the rotor to get it off, so you need it up out of the way.  Luckily for us the calipers just slid off.  I popped the pads out of the caliper.  They were pretty low, almost down to the metal.  Because we had added brake fluid a few weeks ago we needed to get a clamp on the caliper piston to bring it back so that we could insert the new pads.  The side closes to the piston is the side that had the metal tab on the side of the caliper.  With the extra fluid in the reservoir when we compressed both calipers we had some overflow from the reservoir.  Once the pads were in, we just reversed the process to get everything back to normal. 

I hear there may be some surprises with the rear rotors, but we will have to find out.  Also, my Pathfinder will need new pads this fall, but I hear the rotors are difficult to get off in a Pathfinder, so I need to leave some extra time for that job.

Anyways, after changing pads this is something that most people should be at least aware of how to do, and do it once.  Please leave some of your tricks for doing brake work down in the comments section.

Friday, June 15, 2012

Hot tub sensor swap

As I mentioned on the May Long weekend post I had to change the sensors on the hot tub.  I wanted to break this post out just so that people can find it in the future for those that are interested. I have a Polar Spa hot tub that is over 6 years old.  The name plate is wore a little and the model and dates are no longer present.  It is controlled by a Balboa M-series controller.

On the Friday of the May long weekend I opened up the hot tub to see a sensor error (code Sn).  This means that there is an error between the Sensor A (the inflow sensor) and Sensor B (the outflow sensor).  I called my hot tub guy up to find out what I could do about this.  Kyle over at J&J Service Tech in Calgary is a fantastic guy and answers my questions whenever I have them.  Kyle told me to shut the power off for 30mins to see if it would reset.  After the alotted time was over I turned the power back on and I got a Sensor B error (code Sb).  This code states that there is a malfunction with that sensor.  With another quick chat with Kyle and I found out that he did not have any sensors left as it is a busy time of year for getting hot tubs operational.  He suggested a few places that I try that I might find them.  He told me the part that I was looking for was the M7 Sensor.

Armed with my knowledge I set out to find the sensors.  After a quick google search and some waiting for stock checks I found some.  I figured if I was going to change one I might as well change both.  I drained the hot tub to below the heating tube.  You do not need to completely drain the hot tub, just make sure the water line is below where you are working.  I pulled the cover off of the controller and traced the lines from the sensors to their connection points on the board.  The circuit diagram is printed on the inside of the controller cover, and I always double check what I am working on is what the diagram says it is. 

Here are where the two sensors are located at.


Change the sensors was easy, just unthread and unplug them .  Then thread in the new one and plug it in the correct spot on the board.  I tucked the wires out of the way and put the cover back on.  I refilled it and turned the power back on.  It takes a minute for it to initialize then it indicated that it was operating correctly.

If you have any comments or questions please share below. You can also follow me on twitter at https://twitter.com/@bjshideler

Propane Regulator

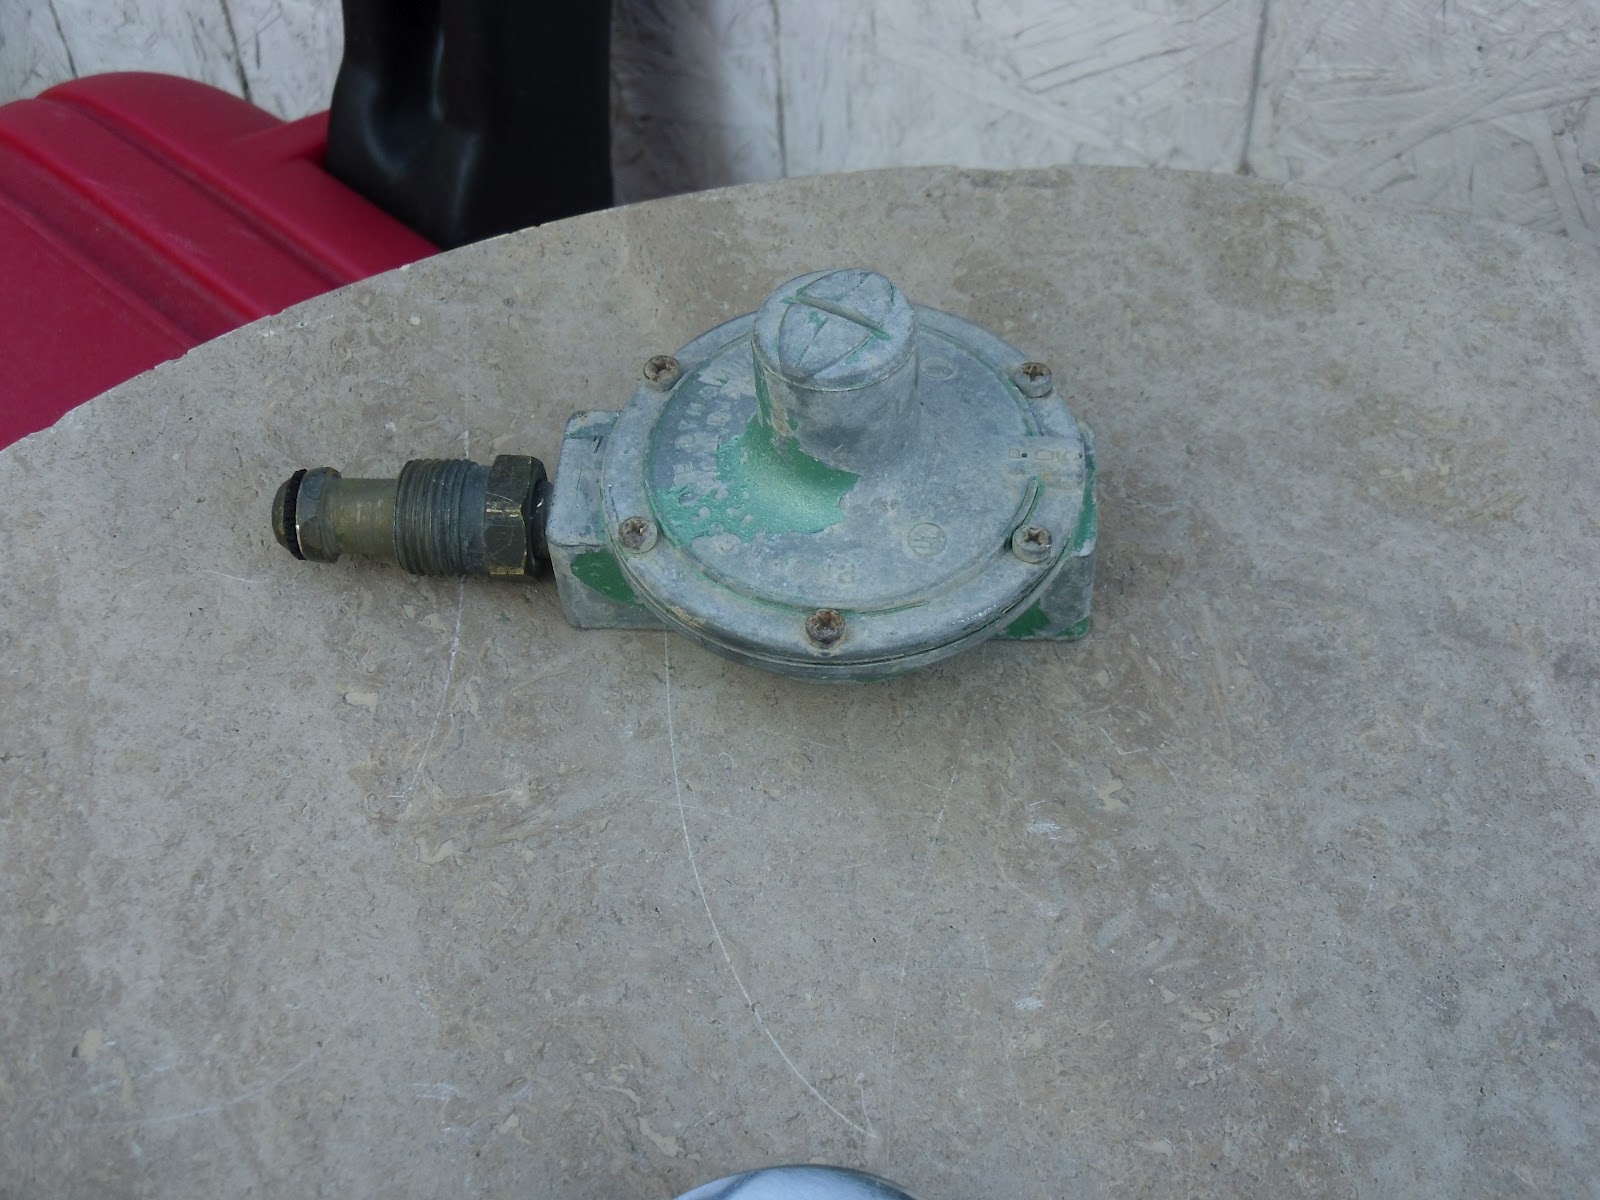
Now is the time of year where I start to do some trailer work.  When I have posted on my blog before about about work that I have done on my trailer, it has been popular.  I felt that I was not getting enough flow out of my propane system, especially on the propane light and knowing that the previous owner never used the propane system I figured that something was plugged in the system.  After a quick search on the Internet most people blame the regulator.  It is very possible that the regulator was clogged or damaged as I am sure that it had travelled a few miles without being plugged into a tank, and then being stored that way too, not to mention that the trailer is from the 70's so it is probably getting near the end of its useful life.  I decided that I would replace the regulator, and while I was at it upgrade the end of the hose to the new style so that I did not need to bring a crescent wrench down to the trailer when I wanted to change propane tanks. 

I know very little about gas fitting, other than standard plumbing rules.  I know that they use a different type of Teflon tape than with water.  The first thing I did was remove the old regulator to make sure that I got the right one from the store.  You could remove the nozzle too, but I wanted to change the style and I was not sure of the condition it either.  You cannot see it here, but the O-ring is pretty rough.


I put the old hose that connects to the steel lines on the new regulator.  Here you can also the new nozzle hose and some of the tools I used to get things apart and back together.  I would recommend a bench vise if you have access to one.


I taped all of the connections and made sure that they were very tight.  I reconnected the flex line to the steel lines.  Even though they are rusty they appear to be fairly strong and intact.


Once everything was connected I cracked open the propane tank and checked all of my connections for leaks.  I did not detect any leaks.  It was time for phase 2 of the testing.


I went inside and ran the propane on the stove, and I think the flow is better as I did not do a control test before I removed the regulator to see the flow.  When we bought the trailer there was an old propane light fixture, but the globe was damaged and I did not know what kind of mantle would go onto the light.  So I removed the light fixture and put a brass nipple and elbow and then a Primus fitting (the male fitting on a disposable propane bottle, or 1" x 20 TPI Male fitting) so that I could screw my camp light onto it.  When I put the light on I get a little bit of propane out of the light but there is still not enough flow to the light for it to burn.  I am going to have to experiment a little to find out what is regulating the flow down so that there is not enough propane.  


If you have any thoughts on this or your own propane stories, please share in the comments section.


Tuesday, June 12, 2012

Oil Change

From everyone that I have ever talked to about car maintenance an oil change is by far voted the most important thing to do.  Oil is very crucial to the operation of the engine, it lubricates the parts, helps transfer the heat from the pistons out to the block and the coolant system, maintains a pressure in the system, and helps flush out any grunge that develops from the combustion cycle.  This is the primary reason why the oil filter and oil is changed, also because of the extreme temperatures the oil breaks down and it will not be able to maintain the engine pressure.  You may notice that towards the end of the oil life cycle when you start up your vehicle the low pressure light stays on for a little bit longer than it normally does, this is why.  There is a lot of debate on whether to use regular oil or synthetic oil.  Sure, synthetic oil is really good for you engine, but if you cannot afford it then regular oil will be fine.  It is more important to change your oil frequently.  The maximum distance should be the one recommended in your owners manual.  They same debate occurs with brand of oil filters, the answer is the same, it does not matter.  Oil changes are very easy to do, and the lube shops charge way to much for what they do.  Instead of synthetic oil I use a Lucas Oil additive to replace a litre of oil for it.  This a fantastic product that I believe works to help both old and new engines.

Due to my recent work on the PT cruiser I was a little leery about changing the oil on it as I was afraid that the filter was hidden is some dark crevice of the engine compartment.  After I got the car up on the ramps and crawled underneath I was pleasantly surprised that the oil filter was easy to reach and that the drain plug was right beside it and easy to reach.  I have been changing the oil in cars for a lot of years, but it has been a few years due to the lack of a location and the time to change the oil.  With both vehicles to do now it makes more sense economically.

I also changed the oil in my 2001 PT Cruiser.  The lube shops charge an extra $10 for the privilege of removing the bottom skid plate (shroud).  There was 4 bolts (a few have been lost), it is ridiculous that they charge for that.  Once I got the plate of it took me a moment to locate the drain plug as it was not located exactly on the bottom of the engine like most other engines.  It looks like a little remote drain plug location, which makes it really to drain the oil.  I think more vehicles should have it, especially now that I know what it is.

For those that haven't changed oil before here is the quick rundown of how I do it.

1.) Put the car on ramps and engage the parking break.
2.) Open the hood up and remove the oil filler cap.
3.) Put a drain pan underneath the drain plug and remove the drain plug.
4.) Remove the oil filter and drain into drain pan (may need a wrench).
5.) Put a little oil on the gasket ring of the new oil filter.  The used oil is fine.
6.) Install new oil filter.  Turn the oil filter 1/3 turn past the contact point.
7.) Reinstall the oil plug.
8.) Add oil (amount is in owner's manual).
9.) Reinstall the oil fill cap.
10.) Start car and check for leaks.

Here is a good reference from Amsoil that you can look up the fluid capacities needed.

This is the procedure that I learned when I was 13 and I have been doing it ever since.  Share some of your oil change stories in the comments below.