Saturday, February 16, 2013

Bathroom Bathtub Install

We purchased the bathtub from RONA it was a “Corinthia II” made by Advanta by Maax.  As mentioned we wanted a taller tub and needed one that was right-side installation.  We also got the overflow kit and accessories from RONA.  The tub it was replacing was a standard size so this was pretty easy change.

As I mentioned in a previous post we purchased the bathtub from RONA it was a “Corinthia II” made by Advanta by Maax.  In this post I will discuss the installation of the tub.  This tub has raised under structure so if you wanted a right side drain tub, but had the plumbing in for a left it could be accommodated, but I was already set for a right side drain and I wanted to keep it that way.  I did not take any pictures of me setting this up, so I will do my best to describe the process.

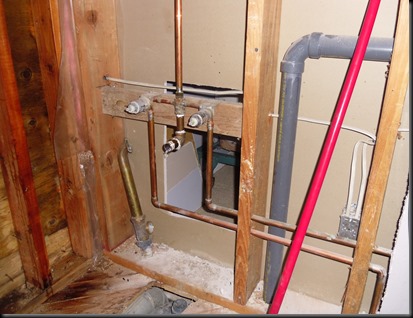
As with any floor space I am sure it is crowded in between the joists, and mine was no different, I had a HVAC duct running beside my drain lines.  I also discovered when I was getting to put the drain/overflow kit on that the original P-trap was not properly glue onto the pipe.  I corrected this when I glued the other parts back on. 

The first step with the tub install is the base.  It needs to be level.  I found the instructions a little bit confusing at first as they were talking about laying a mortar bed down of self-levelling material on top of the sub floor.  I pulled out my level and I checked the floor all different ways and I was within acceptable limits for the floor level.  Meaning the bubble was touching the line but not going past.  Now onto the edge support.  The edge of the tub needs to be supported underneath it and calls for a 1x3 ledger.  I would usually like to use a 2x4 as the ledger support and I contemplated it, but when I checked to see if a 2x4 would fit it looked like it would rest too far in and I was not sure if it could take the structural strain at that location.  I marked out where the ledger should go and installed it level as well.
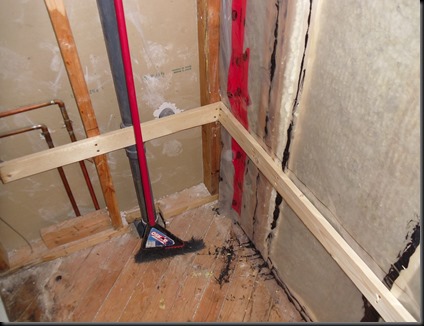
SAM_0377

It was time to hook up the plumbing.  I tried to measure where the center of the drain was and got close.  I measured the ABS pipe and cut it long and then slowly cut it down until it fit.  Once the pipes were the right length I glued them together.  While the glue was still wet I screwed in the overflow drain and the main drain.  There was gaskets everywhere except for under the main drain.  Under the main drain plumber’s putty was used.  I was not sure how tight to tighten the drain so I went as tight as I could.  I did not have a drain key wrench so I used the stopper and had used a monkey wrench to tighten it.
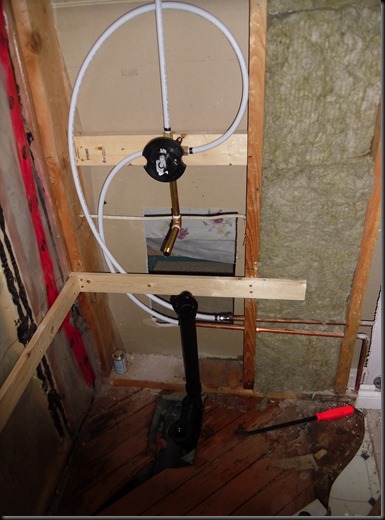
 
SAM_0376

This was all that the original tub had securing it, but the instructions that came with the tub said to screw the edge into the studs.  You need to pre-drill pilot holes into the fiberglass and then put screws in.  Please make sure to use safety glasses as fragments fly out of the material quite easily.

Though the original tub was a standard size the space was a little long I made sure to have it tight against the wall.  The drywall is then mounted so that it rests on top of the nailing fin.  If the wall was straight then the drywall would be flush with the nailing fin.  I was rushed to get this complete and did not ensure this.  The opposite edge of the tub needed another sheet of drywall to build it out.

One thing that we noticed as I was getting ready to place the tub was existing floor.  We were trying to keep the tiled floor as it looked in decent shape, but with the tub out I could examine the underlay to it and noticed that at the edges of the tub that there was ProBoard underneath it and that it was rotten at the corners.  ProBoard is usually used underneath linoleum not tile.  We decided that we would replace the tile in the bathroom to deal with the compromised underlay.  As we peeled back the first few tiles we found the original linoleum still there but had been screwed down.  This is a cheap way to do it and was not done right either.

I had previously installed the faucet and will discuss that install in a future post.  Does anybody have any special tricks that they do to install tubs? Discuss below.
Wednesday, February 6, 2013

Bathroom Structure

Now that the bathtub area had been gutted down to the sheathing on the exterior it was time to rebuild.  To replace the studs that were removed I basically built a small wall that I slid into place.  It was much easier to have a top and bottom plate that I could have as a frame that I could insert into the space and then just nail it all into place on all sides rather than having to have to toe nail the bottom of the studs into the original sill plate. 

SAM_0375

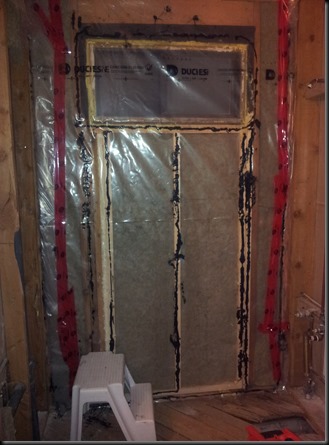
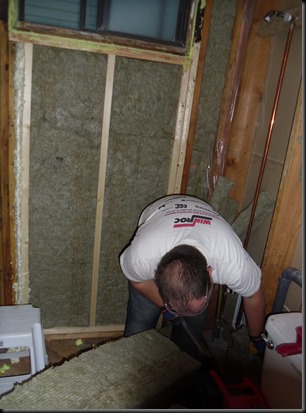
I foamed around the window with some window foam that I had and then we started to insulate.  We used the Roxul insulation as it is made from rock wool and will not mould.  I use it commercial applications all the time and know that it is a good product.  I usually see the guys try and cut this stuff with an Olfa knife, but it is not very efficient.  A quick read of the bag recommends that you use a serrated knife.  We have one of those ever-sharp knives that they show can cut through a penny and then still be sharp enough to cut through a tomato.  It has a serrated blade and I figured it should not get dull either.  It worked like a charm.

2012-11-03 22.27.57

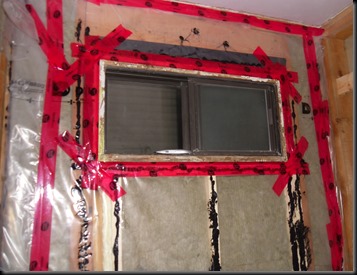
From there it was time to put the vapour barrier up.  I used the CGSB vapour barrier that is a fairly heavy poly.  The roll is kind of big, but with some work in the basement coming up I was not too upset with that.  One thing that the older houses never did was seal the barrier to anything they just tacked it up.  Well I used plenty of acoustical sealant on the wall.  And then I used Tuck tape to make the seal with the flaps of vapour barrier that were from the adjoining section of walls. 

 SAM_0378

It was time to cut out the window and seal it up.  Air penetration is one of the greatest causes for a reduction in insulation value, as well I do not want any moist air travelling through this wall again so I made sure I was using lots of tape.

Well, I shall leave this installment here at this stage.  Next time I will discuss the install of the bathtub. Please leave your comments on what success you have had with this type of work or any questions that you may have.

You can follow the progress in this project by following this link or by clicking on any of the tags.
http://projectsbyben.blogspot.ca/search/label/bathroom

Monday, January 28, 2013

Bathroom Demolition

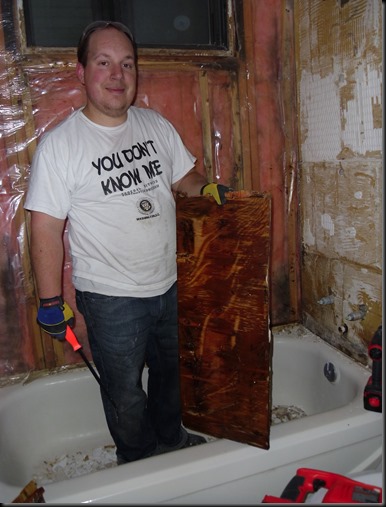
The first step of any renovation project usually starts with demolition, and this one is no different.  I am sure most of you have watched the renovation shows on HGTV where people start bashing the walls in, well that is what we did, but I don’t have a sledge hammer or a large pry bar.  I just have a regular hammer and a small pry bar.  We were replacing the tub so we did not care about scratching it up, or we would have placed a drop clothe in it.  One tip is to plug the drain so debris doesn’t fall into the trap. 

We knew there was water behind the tile as the grout would be wet after we would come home from being away for the weekend, but we weren’t prepared for how much water was behind the wall. 

SAM_0338

SAM_0348

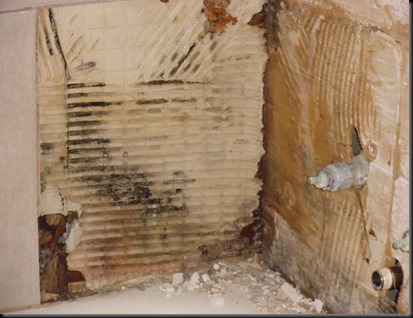
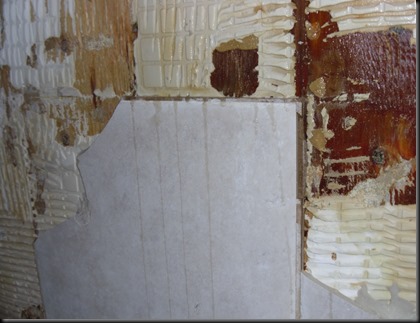
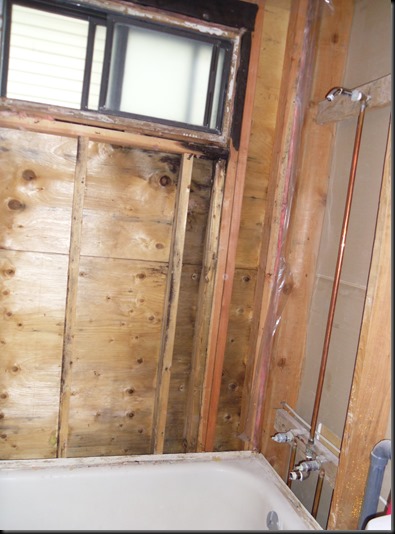
The whole substrate was soaking wet with water.  We were now able to identify why were having some of the problems.  As you can see from the pictures you can see the screed marks from the trowel when the tile was placed on the wall, with some small indentations from the tile in it.  Wall tile should be "back-buttered” which means to put some mortar on the back of the tile as well as on the wall.  This helps the two adhere to each other better.  So the screed marks are good channels for the water to run along, and being on an exterior wall somewhat susceptible to freeze thaw cycles that we experience here in Calgary.  The lack of adhesion was also noticed when were were knocking tiles off with a light blow with the hammer and several tiles would fall off the wall. 

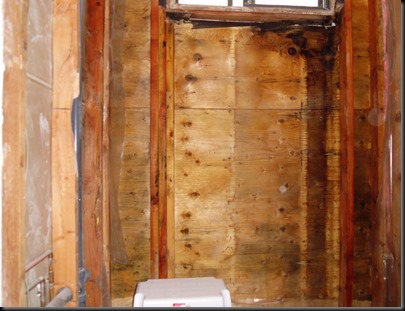
Another major problem was the fact that the backing board was plywood.  In other locations plywood is a great substrate for tile, but in a bathroom wall it should really be tile backer board or cement board and a waterproof membrane is not a bad idea either.  As can be seen above the plywood was soaked as well and developing mould in places, so off it came.  

SAM_0360
As the bathtub is 60” long there is a joint in the plywood.  You can see that the plywood was placed vertically and the joint was placed on side nearest the faucet and fixtures. 
SAM_0364

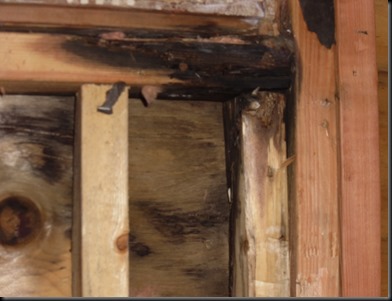
The plywood is soaked on the back side of the plywood.  Notice that there is a window in the wall so the plywood joint comes basically in the bottom corner near the faucet and fixtures.  This should be avoided if possible so that if water were to migrate through finish it cannot make it to the structure and do damage there.  The insulation had been changed from the original, and I know this because there was yellow batts of fiberglass insulation tucked down beside the tub.  The vapour barrier that was used was a flimsy poly and was not adhered to the studs with anything more than staples.  There is a proper poly for vapour barrier and an acoustical sealant should be used as well to stop air flow around the poly.

SAM_0371

SAM_0370

As you can see the sill joist and the jack stud were severally rotten due to moisture that had penetrated in the past.  I was surprised though that that would was dry.  The damaged had been done earlier in its 32 years of life.

SAM_0372

So out came a couple of studs and the sill for the window and one of the cripple studs came out partially to sound wood.

SAM_0373

The last part of the demolition came with the tub removal.  There was an access hole through the wall in my daughter’s room, but it was not big enough to work comfortable in so I made it bigger.  I had to reach down under the tub and unscrew the P-trap fittings and the overflow drain.  That was all that was holding the tub in place.  I just had to lift it out, which takes a bit of effort with the steel tubs.

On the next post we will start to put it back together.

Tuesday, January 1, 2013

Bathroom Reno Project

We have noticed for a while that there has been water weeping through the grout on the wall in the shower.  The wall would be wet still even after days away from home.  There was lots of cracks in the grout and these may have appeared when we bought the house and the heat had been turned off and the house was –30C, but there is no way to be sure. 

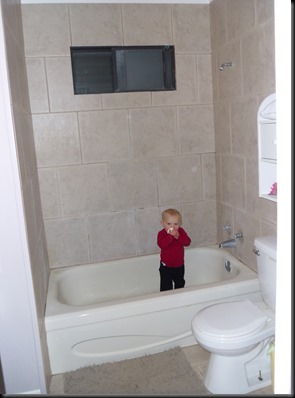
Here is my daughter in the tub as we prepared to gut the whole thing. 

SAM_0332

Since we are going through the work of replacing the tub surround my wife also wants a new tub that is taller, and we are going to change to the pressure balanced faucet to make it safer for the girls. 
To be able to expedite the work I made sure that I had all of the major components on hand.

The tub surround we purchased from Home Hardware and we got a TW57 79” 1 Piece White Tub wall.  We chose this one for several reasons. The main was that I did not want any water to get in behind it, so a 1 piece was very appealing.  We have a window in the middle of the wall as can be seen in the picture above.  The edges are approximately 13” from the corners so a tub surround that had high shelves or ridges in the polystyrene would be out of the question as we did not want a large opening in the window frame.  And finally the white color matches the new tub.

We purchased the bathtub from RONA it was a “Corinthia II” made by Advanta by Maax.  As mentioned we wanted a taller tub and needed one that was right-side installation.  We also got the overflow kit and accessories from RONA.  The tub it was replacing was a standard size so this was pretty easy change.

The Tub/Shower Handshower we purchased from Home Depot it was the 8P8-PDHC Price Pfister Pasadena Handheld Shower Single Handle Tub and Shower Faucet - Polished Chrome. I really like to have a handshower so that was a priority and my wife wanted it to look pretty so this is what we landed on. 
I will go into more detail on the steps of the project in future posts as well as reviews of the above products that we used.

You can follow the progress in this project by following this link or by clicking on any of the tags.
http://projectsbyben.blogspot.ca/search/label/bathroom